0x00 搭建环境 这个官方文档确实不人道,怪不得没有多少写这玩意的
每个人搭建思路方式不一样,
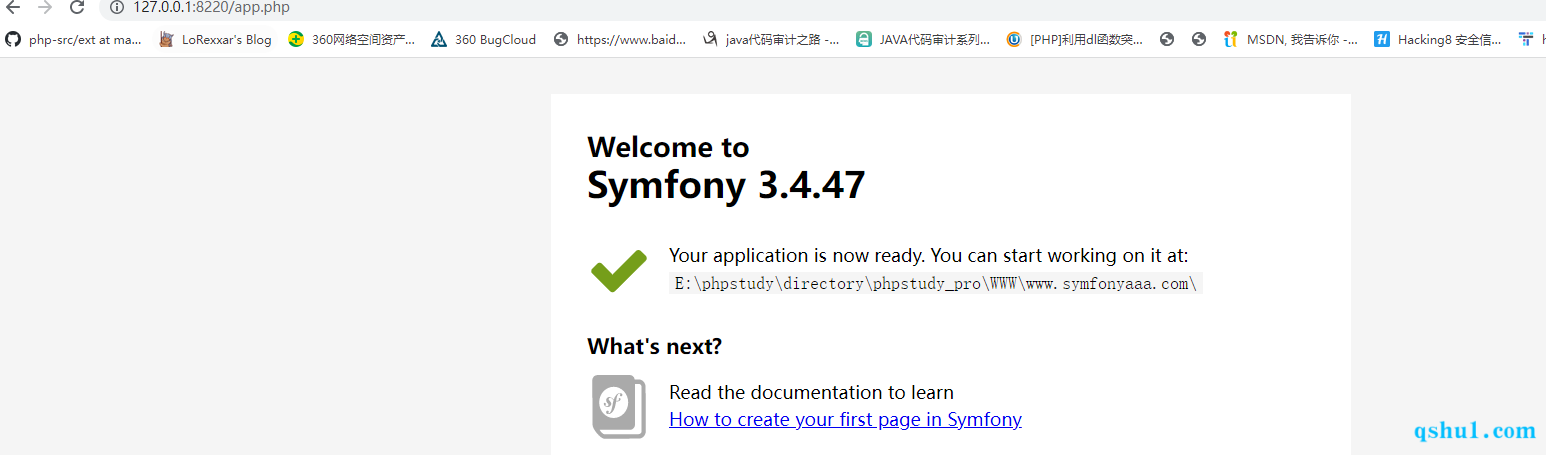
我这里直接选择使用composer安装的,安装完成之后,直接访问如下
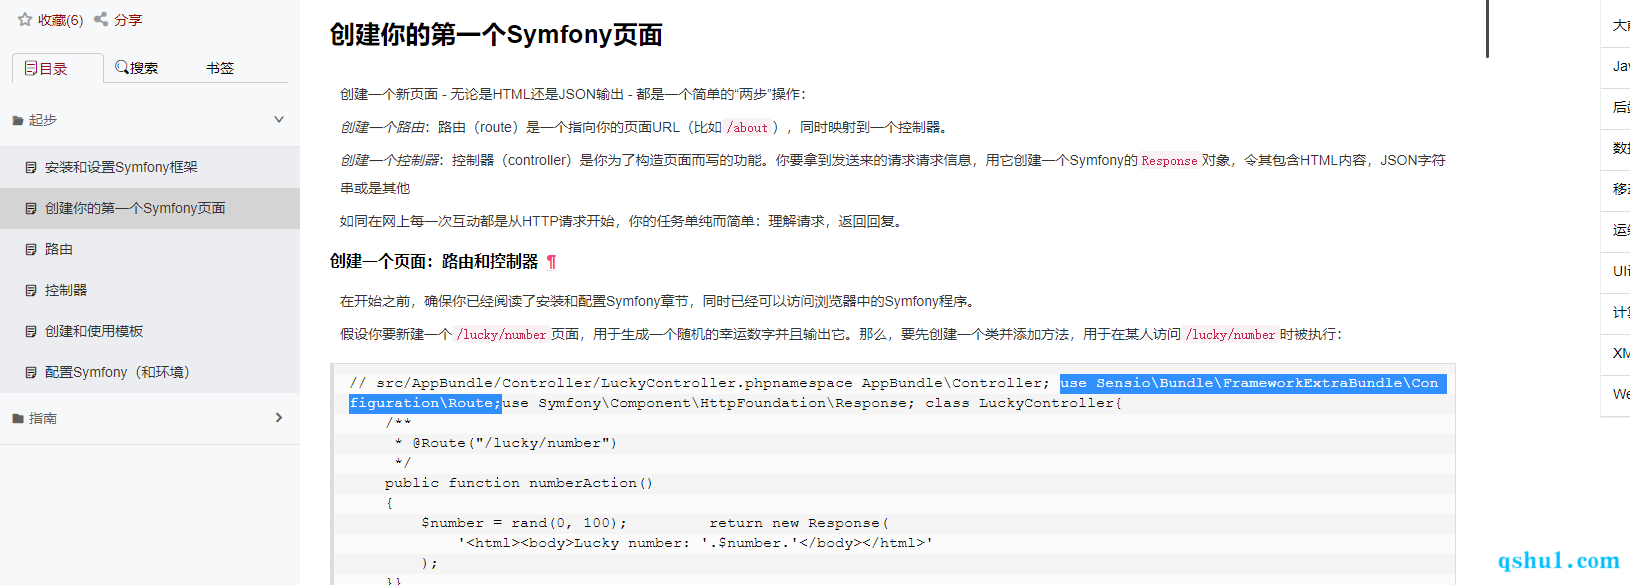
0x01创建第一个页面 这一步才是最主要的
根据官方的文档,在生产环境中跑不出来
只有在开发环境中可以跑
这里分步骤来说
首先创建一个控制器src/AppBundle/Controller/HelloController.php
1
2
3
4
5
6
7
8
9
10
11
12
13
14
15
16
17
<?php namespace AppBundle \Controller ;use Symfony \Bundle \FrameworkBundle \Controller \Controller ;use Symfony \Component \HttpFoundation \JsonResponse ;class HelloController extends Controller public function indexAction ( { $ajax_res = "hello world" ; return new JsonResponse($ajax_res ); } }
然后创建路由src/AppBundle/Resources/config
yml版
1
2
3
hello: path: /hello/index defaults: { _controller: AppBundle:Hello:index }
php版
1
2
3
4
5
6
7
8
9
10
<?php use Symfony \Component \Routing \RouteCollection ;use Symfony \Component \Routing \Route ;$collection = new RouteCollection();$collection ->add('index' , new Route('/hello/index' , array ( '_controller' => 'AppBundle:Hello:index' , ))); return $collection ;
到此为止依然是不能访问的
还有另外一种创建的方法
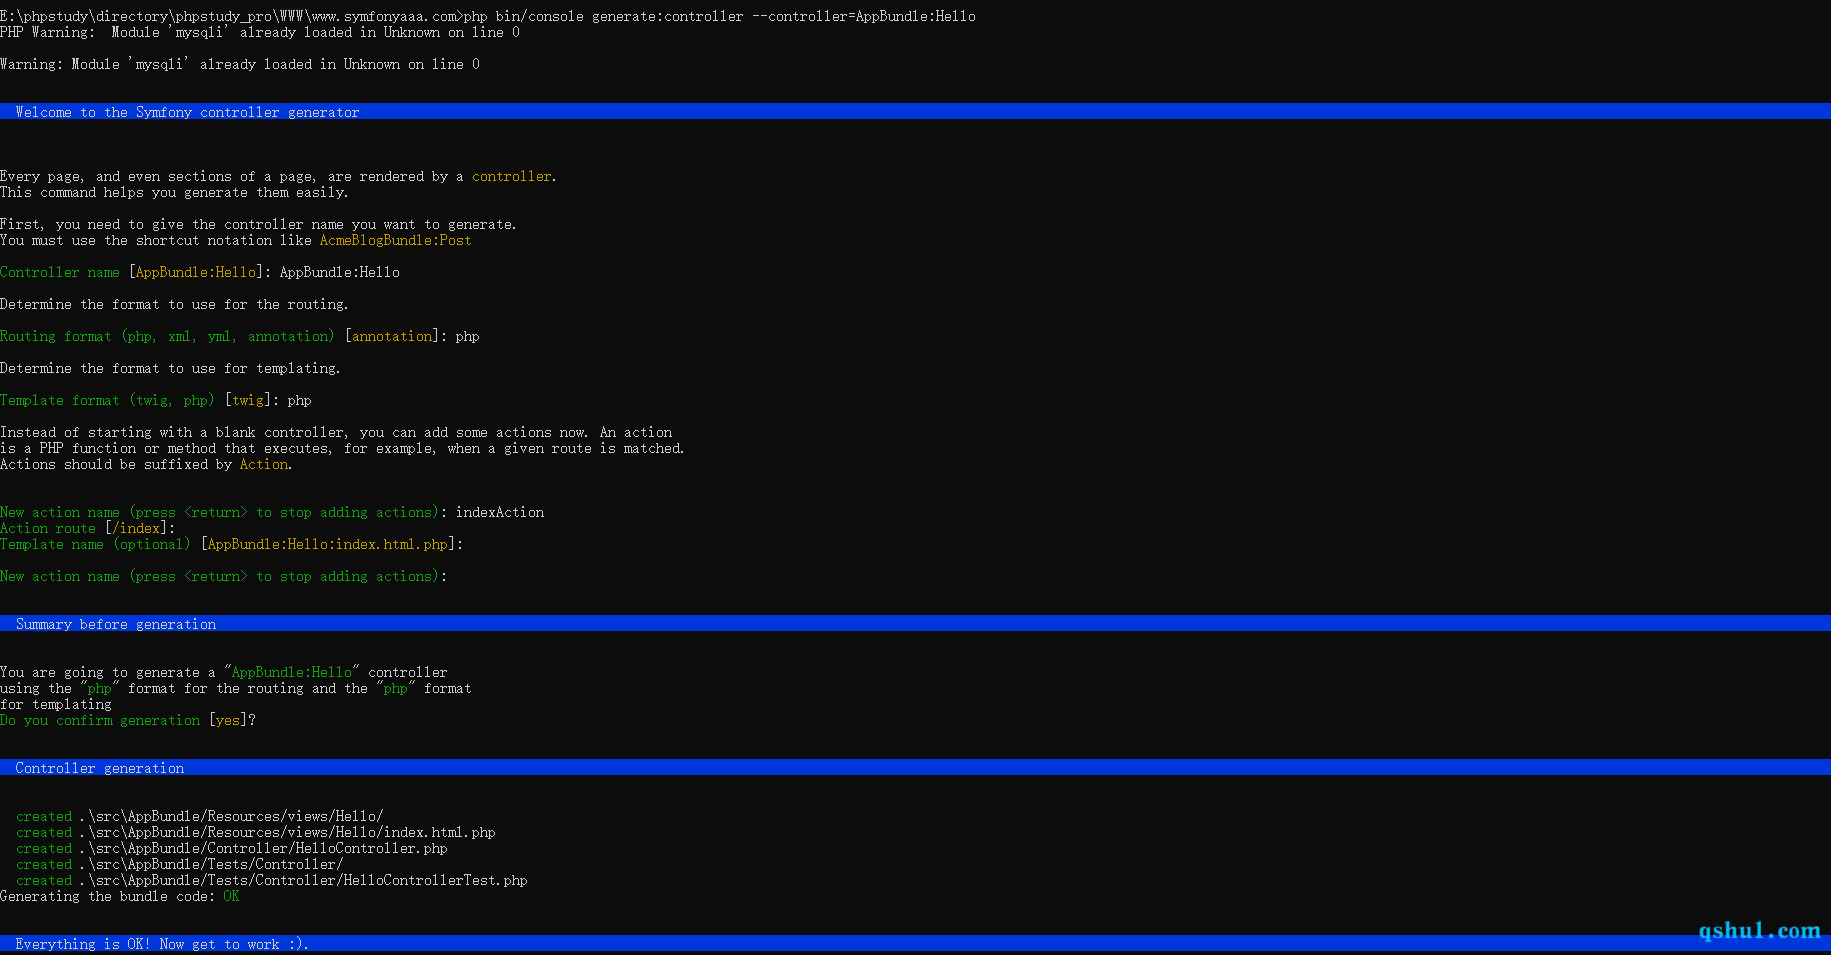
修改bin/console文件
1 2 3 4 5 6 7 8 9 10 11 12 13 14 15 16 17 18 19 20 21 22 23 24 25 26 27 28 <?php use Symfony \Bundle \FrameworkBundle \Console \Application ;use Symfony \Component \Console \Input \ArgvInput ;use Symfony \Component \Debug \Debug ;set_time_limit(0 ); require __DIR__ .'/../vendor/autoload.php' ;$input = new ArgvInput();$env = 'dev' ;$debug = 1 ;if ($debug ) { Debug::enable(); } $kernel = new AppKernel($env , $debug );$application = new Application($kernel );$application ->run($input );
然后再命令行输入
1 php bin/console generate:controller --controller=AppBundle:Hello
这个时候依然是不能访问的
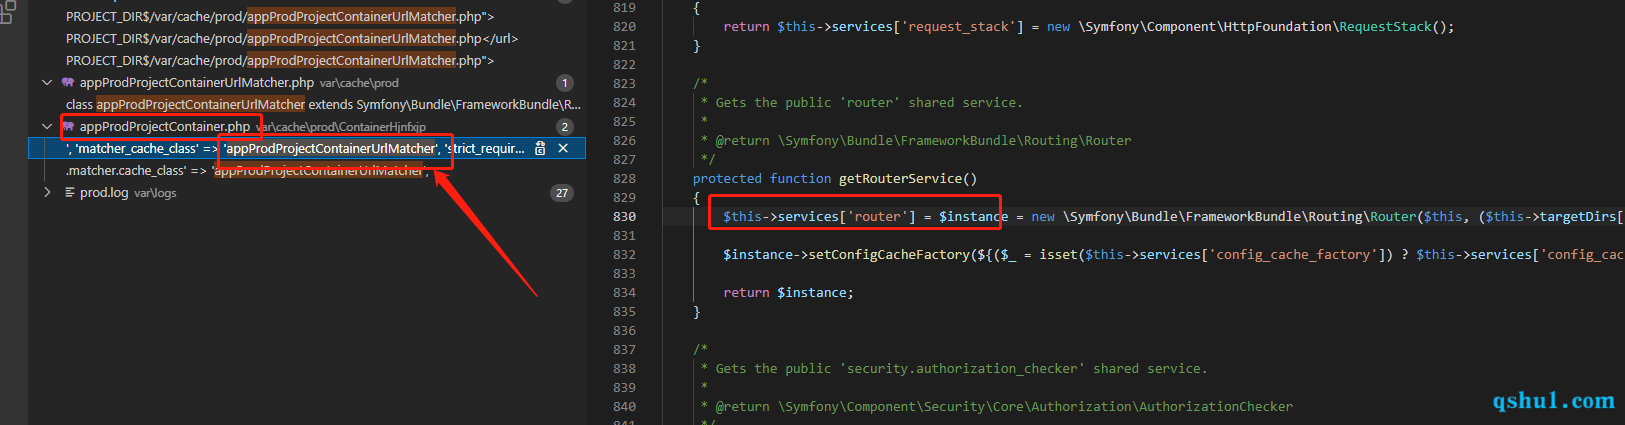
因为生产环境并没有这个路由,也不像thinkphp那样直接加载或者直接就能访问
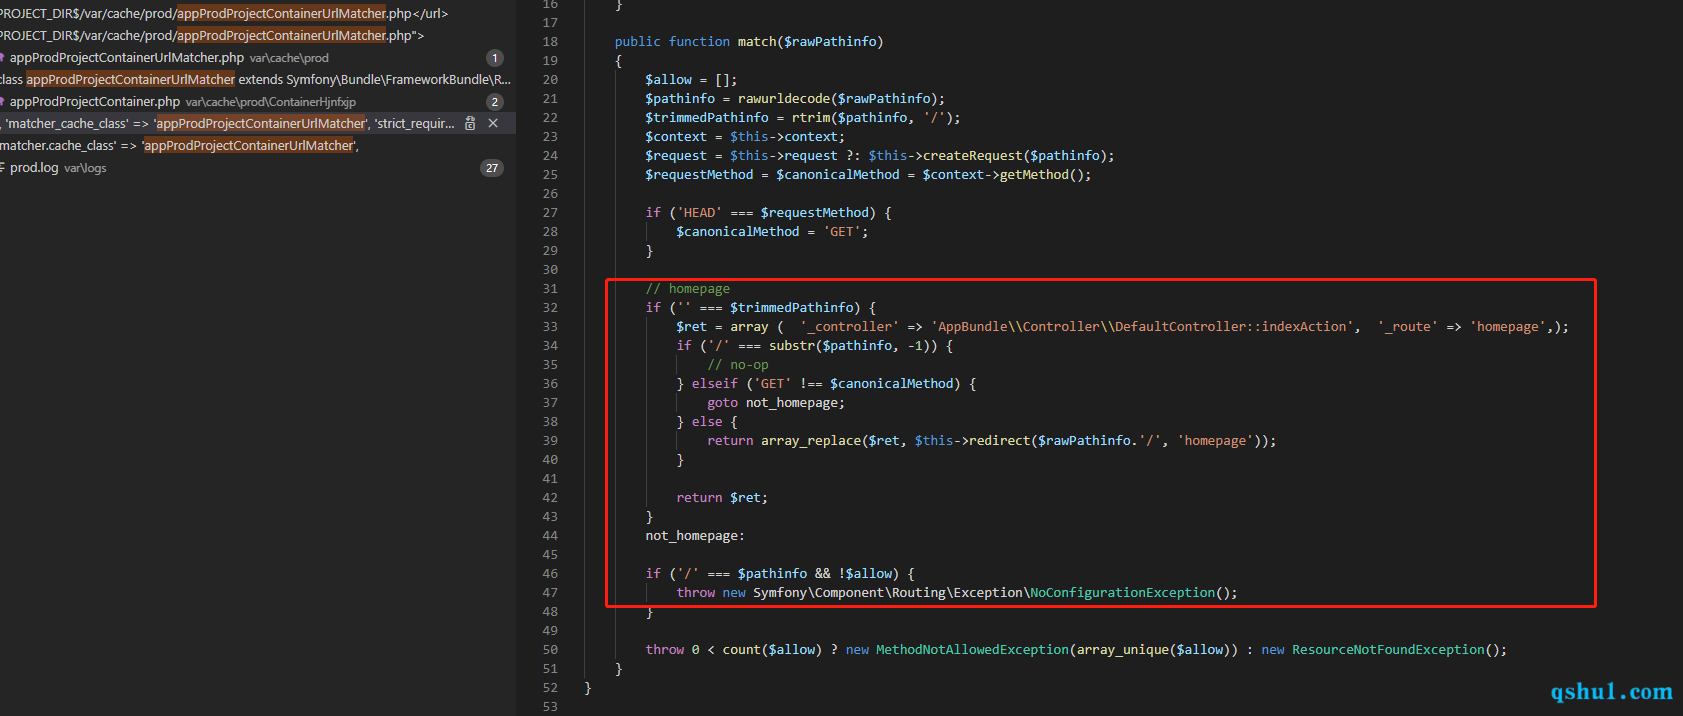
下面可以看到加载的生产环境的url解析的类
这时候,并没有任何其他路由的解析,只能访问默认的homepage
而访问我们新加的页面都是抛出异常404
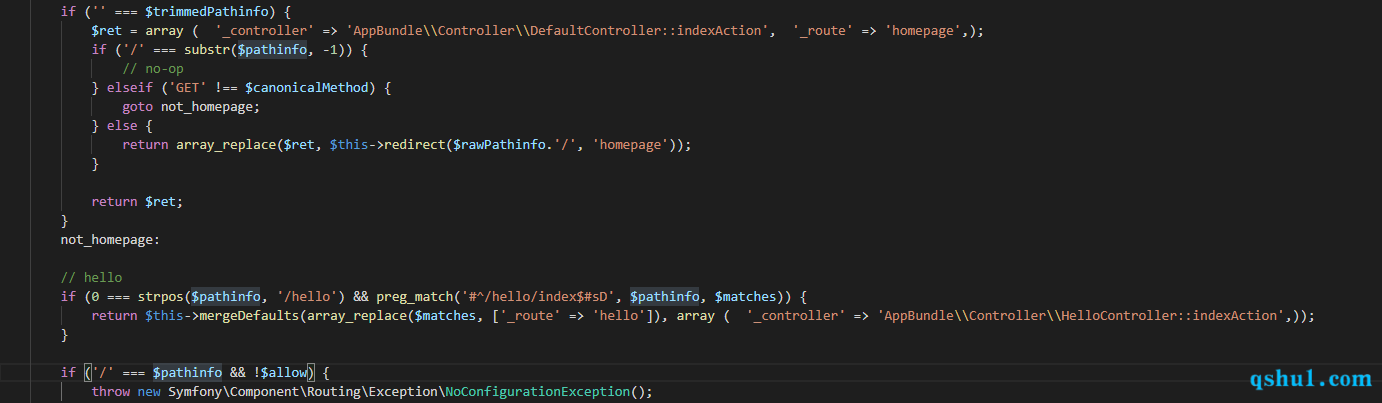
在appProdProjectContainerUrlMatcher类中添加如下代码
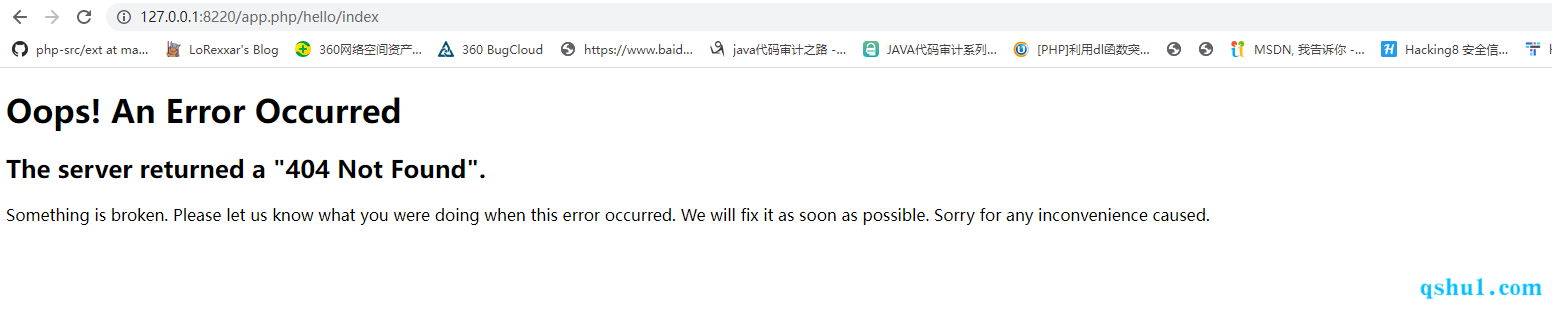
1 2 3 4 if (0 === strpos($pathinfo , '/hello' ) && preg_match('#^/hello/index$#sD' , $pathinfo , $matches )) { return $this ->mergeDefaults(array_replace($matches , ['_route' => 'hello' ]), array ( '_controller' => 'AppBundle\\Controller\\HelloController::indexAction' ,)); }
此时成功访问
0x02 新建bundle 如果需要新建一个Bundle
直接在src目录下新建一个TestBundle目录
分别创建如下文件
TestBundle/TestBundle.php
1
2
3
4
5
6
7
8
9
10
<?php namespace TestBundle ;use Symfony \Component \HttpKernel \Bundle \Bundle ;class TestBundle extends Bundle }
TestBundle/Controller/LuckyController.php
1
2
3
4
5
6
7
8
9
10
11
12
13
14
15
16
17
18
19
20
<?php namespace TestBundle \Controller ;use Symfony \Component \HttpFoundation \Response ;use Symfony \Component \Routing \Annotation \Route ;class LuckyController public function numberAction ( { $number = random_int(0 , 100 ); return new Response( '<html><body>Lucky number: ' .$number .'</body></html>' ); } }
TestBundle/Resources/config/routing.php
1
2
3
4
5
6
7
8
9
10
<?php use Symfony \Component \Routing \RouteCollection ;use Symfony \Component \Routing \Route ;$collection = new RouteCollection();$collection ->add('number' , new Route('/lucky/number' , array ( '_controller' => 'TestBundle:Lucky:number' , ))); return $collection ;
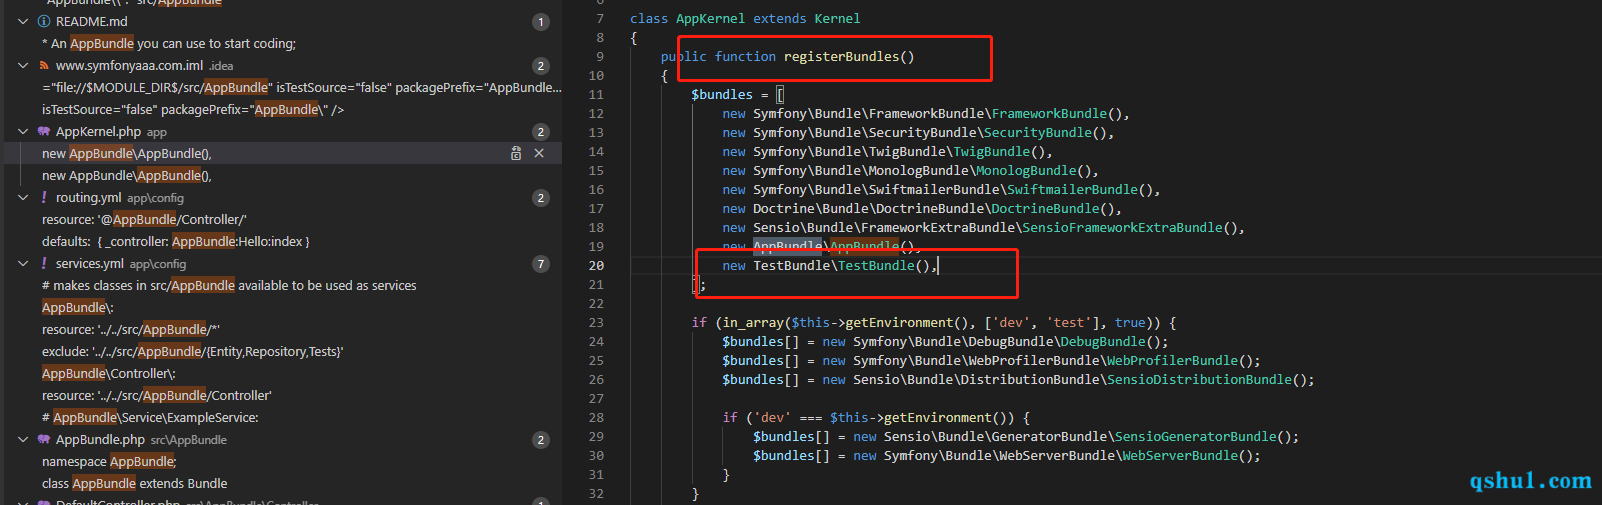
然后在app/AppKernel.php添加new TestBundle\TestBundle(),
然后添加自动加载的代码
vendor/composer/autoload_static.php
然后就成功访问到了自定义的页面
0x04 接下来看看之前的bug